![How to Install Any Claude Skill From GitHub [Step-by-step] - Beginner Tutorial](/_astro/How%20to%20Install%20Any%20Claude%20Skill%20From%20GitHub%20_Step-by-step_%20-%20Beginner%20Tutorial.Cgks_FcS_1swru6.webp)
.Bktem256_23EEnI.webp)
.rrgOIsSz_Z2n0to0.webp)
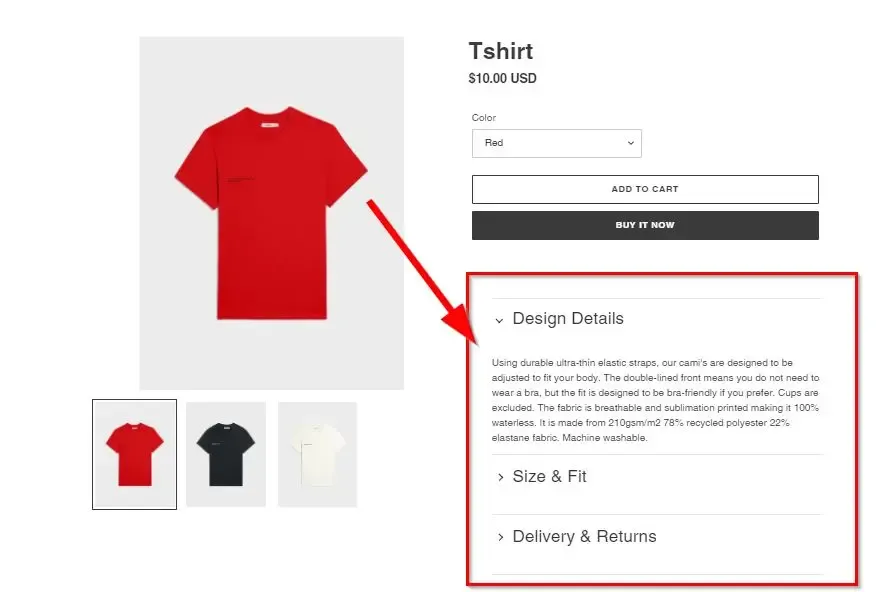
If you’re looking to add some extra flair to your Shopify store, one way to do it is by adding a collapsible accordion for product descriptions. This can help break up longer descriptions and make them more visually appealing. Plus, it’s a relatively easy thing to do! In this post, we’ll show you how to create a collapsible accordion for product descriptions in Shopify. Read on to learn more.
**
Add Code in Theme.liquid File – First Step**
Add following code below <head> in “Theme.liquid” file
<script src="https://ajax.googleapis.com/ajax/libs/jquery/3.5.1/jquery.min.js"></script>Add Code in CSS File – Second Step
Add the following code in the CSS file of your Shopify Theme
/* Accordion CSS Code by WebSensePro.com
https://websensepro.com/blog/how-to-create-collapsible-accordion-for-product-description-shopify/
*/
.accordion {
	 margin: 1rem 0;
	 padding: 0;
	 list-style: none;
	 border-top: 1px solid #e5e5e5;
}
 .accordion-item {
	 border-bottom: 1px solid #e5e5e5;
   list-style: none !important;
}
/* Thumb */
 .accordion-thumb {
	 margin: 0;
	 padding: 0.8rem 0;
	 cursor: pointer;
	 font-weight: normal;
}
 .accordion-thumb::before {
	 content: '';
	 display: inline-block;
	 height: 7px;
	 width: 7px;
	 margin-right: 1rem;
	 margin-left: 0.5rem;
	 vertical-align: middle;
	 border-right: 1px solid;
	 border-bottom: 1px solid;
	 transform: rotate(-45deg);
	 transition: transform 0.2s ease-out;
}
/* Panel */
 .accordion-panel {
	 margin: 0;
	 padding-bottom: 0.8rem;
	 display: none;
}
/* Active */
 .accordion-item.is-active .accordion-thumb::before {
	 transform: rotate(45deg);
}
Add Code in JS File – Third Step
Add the following code in JS file of your Shopify Theme
// Accordion by WebSensePro.com
$(function() {
	// (Optional) Active an item if it has the class "is-active"
	$(".accordion > .accordion-item.is-active").children(".accordion-panel").slideDown();

	$(".accordion > .accordion-item").click(function() {
		// Cancel the siblings
		$(this).siblings(".accordion-item").removeClass("is-active").children(".accordion-panel").slideUp();
		// Toggle the item
		$(this).toggleClass("is-active").children(".accordion-panel").slideToggle("ease-out");
	});
});
Create Meta Fields – Fourth Step
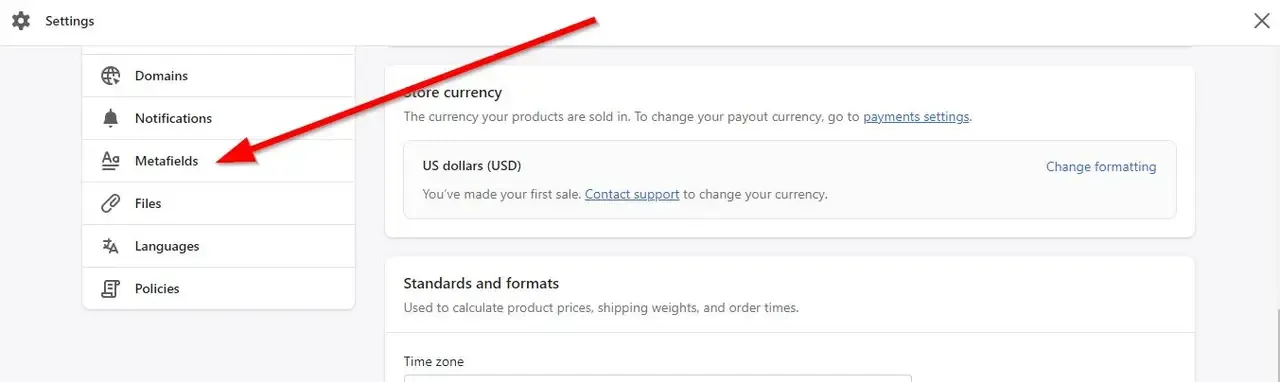
Go to Shopify > Settings > Metafields, as per the screenshot below:
Create Meta Fields as per the screenshot below:
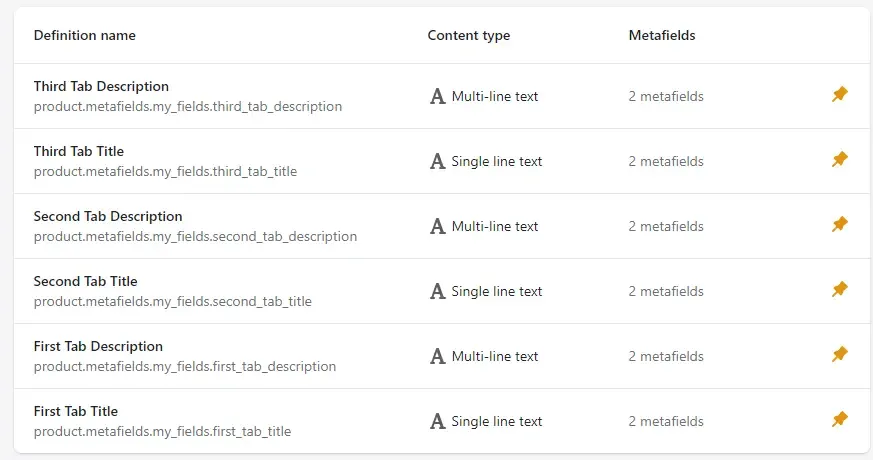
Make sure to carefully match the Meta Fields name from the fourth and fifth step.
**
Add Code in Product-template.liquid File – Fifth Step**
Add the following code in your “product-template.liquid” File by replacing “{{ product.description }}” code
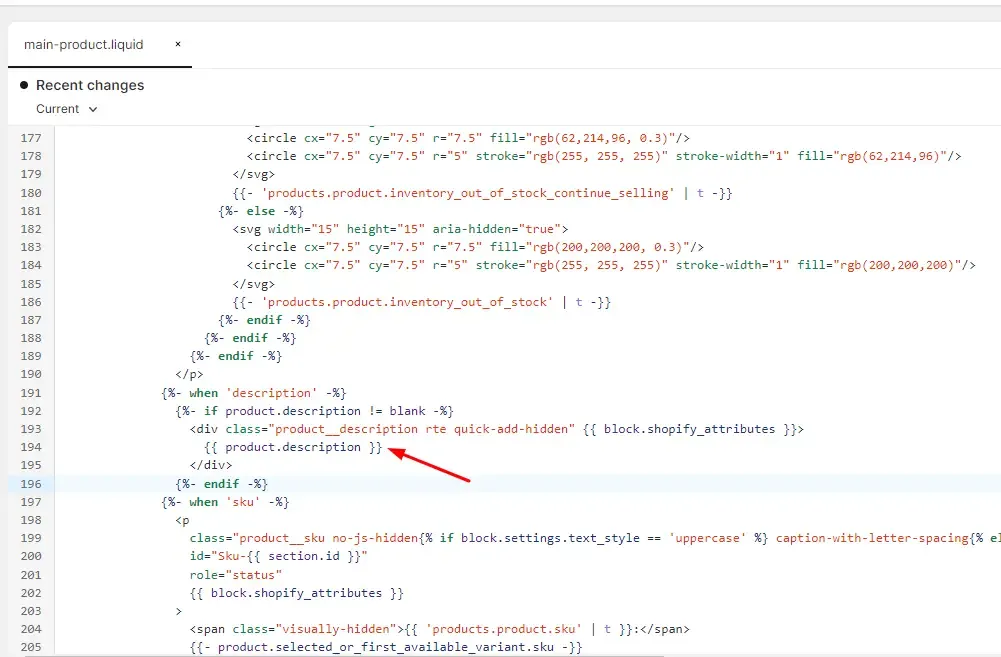
<ul class="accordion">
<li class="accordion-item is-active">
<h3 class="accordion-thumb">{{ product.metafields.my_fields.first_tab_title }}</h3>
<p class="accordion-panel">{{ product.metafields.my_fields.first_tab_description }}</p>
</li>
<li class="accordion-item">
<h3 class="accordion-thumb">{{ product.metafields.my_fields.second_tab_title }}</h3>
<p class="accordion-panel">{{ product.metafields.my_fields.second_tab_description }}</p>
</li>
<li class="accordion-item">
<h3 class="accordion-thumb">{{ product.metafields.my_fields.third_tab_title }}</h3>
<p class="accordion-panel">{{ product.metafields.my_fields.third_tab_description }}</p>
</li>
</ul>
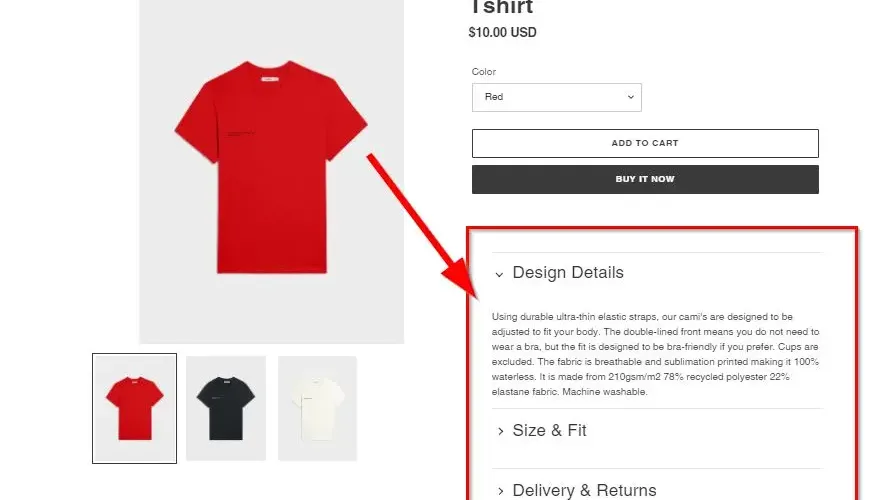
Result:
The result should show accordions similar to the following screenshot: